How to Fix a Leaky Faucet in the Kitchen: A Comprehensive Guide
Is that persistent drip, drip, drip driving you crazy? A leaky kitchen faucet is more than just an annoyance; it’s a waste of water and money. Fortunately, most leaky faucets are easy to fix with a few basic tools and a little know-how. This comprehensive guide will walk you through the process, step-by-step, helping you silence that drip for good. We’ll cover everything from identifying the type of faucet you have to replacing worn-out parts, ensuring a successful and leak-free repair. With a bit of patience and these instructions, you can confidently tackle this common household problem.
Understanding the Anatomy of Your Kitchen Faucet
Before diving into repairs, it’s crucial to understand the different types of kitchen faucets and their internal components. This knowledge will help you diagnose the problem accurately and choose the right replacement parts.
Common Faucet Types
- Compression Faucets: These are the oldest and simplest type, easily identified by their separate hot and cold water handles. They use rubber washers that compress against the valve seat to stop the flow of water.
- Ball Faucets: Characterized by a single handle that controls both water flow and temperature, ball faucets utilize a ball valve with slots and grooves that align with the faucet’s inlets to regulate water flow.
- Cartridge Faucets: Similar to ball faucets, cartridge faucets also have a single handle. However, instead of a ball valve, they use a cartridge that moves up and down to control water flow and pivots to adjust temperature.
- Ceramic Disc Faucets: These are the most modern and durable type. They feature a ceramic disc cartridge with two closely fitted ceramic discs that slide over each other to control water flow.
Identifying the Source of the Leak
Pinpointing where the leak is coming from is the first step in fixing it. Common leak locations include:
- Around the Handle: This often indicates a worn-out O-ring or packing nut.
- From the Spout: This is usually caused by a worn-out valve seat or cartridge.
- At the Base of the Faucet: This could be due to loose connections or damaged O-rings.
Essential Tools and Materials for Faucet Repair
Having the right tools and materials on hand will make the repair process much smoother and more efficient. Here’s a list of essentials:
- Adjustable Wrench: For loosening and tightening nuts and bolts.
- Screwdrivers (Phillips and Flathead): For removing handles and other components.
- Pliers: For gripping and manipulating small parts.
- Allen Wrench Set: For removing set screws on some faucet handles.
- Basin Wrench: For reaching nuts in tight spaces under the sink.
- Penetrating Oil: To loosen corroded parts.
- White Vinegar: To dissolve mineral deposits.
- Replacement Parts: Washers, O-rings, cartridges, valve seats (specific to your faucet model).
- Plumber’s Grease: To lubricate parts and prevent future corrosion.
- Clean Rags or Sponges: For cleaning up spills.
- Bucket: To catch any remaining water in the pipes.
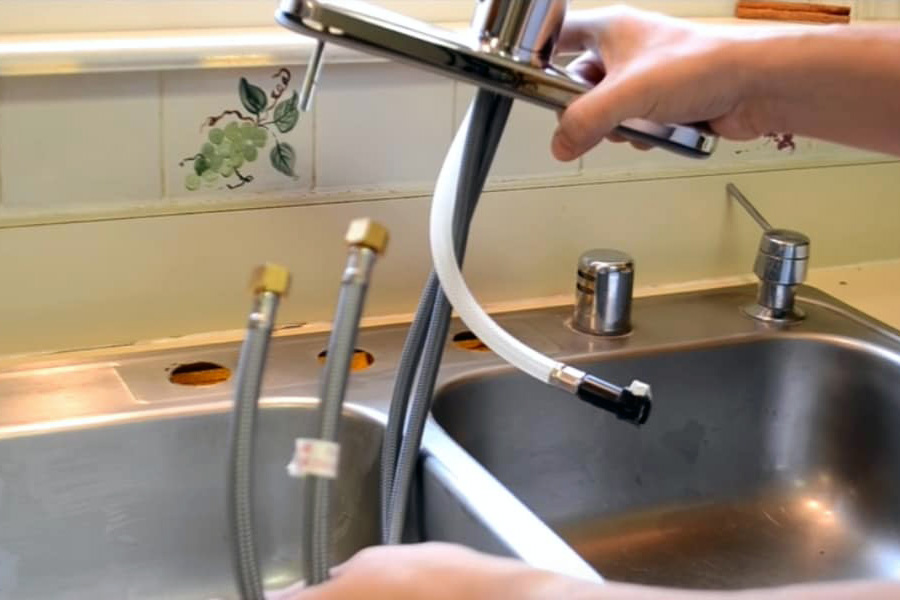
Step-by-Step Guide to Fixing a Leaky Faucet
Now that you understand your faucet and have gathered the necessary tools, let’s get started with the repair process. Always start by turning off the water supply to the faucet. This is usually located under the sink. If you can’t find shut-off valves there, you may need to turn off the main water supply to your house.
Fixing a Compression Faucet Leak
- Turn off the water supply.
- Remove the handle: Use a screwdriver to remove the screw holding the handle in place. You may need to pry off a decorative cap to access the screw.
- Remove the packing nut: Use an adjustable wrench to loosen and remove the packing nut.
- Remove the stem: Pull the stem straight out of the faucet body.
- Replace the washer: Remove the screw holding the washer in place and replace it with a new one.
- Replace the valve seat (optional): If the valve seat is corroded, use a valve seat wrench to remove and replace it.
- Reassemble the faucet: Apply plumber’s grease to the stem threads and reassemble the faucet in the reverse order.
Fixing a Ball Faucet Leak
- Turn off the water supply.
- Loosen the set screw: Use an Allen wrench to loosen the set screw on the side of the handle.
- Remove the handle: Pull the handle straight up and off the faucet body.
- Loosen the cap and collar: Use an adjustable wrench to loosen the cap and collar.
- Remove the ball valve: Lift the ball valve out of the faucet body.
- Replace the O-rings and springs: Use a small screwdriver or pick to remove the old O-rings and springs. Replace them with new ones, lubricating them with plumber’s grease.
- Reassemble the faucet: Reassemble the faucet in the reverse order.
Fixing a Cartridge Faucet Leak
- Turn off the water supply.
- Remove the handle: This may involve removing a set screw or prying off a decorative cap.
- Remove the retaining clip: Use pliers to remove the retaining clip that holds the cartridge in place.
- Remove the cartridge: Pull the cartridge straight up and out of the faucet body. You may need to wiggle it gently.
- Replace the cartridge: Install the new cartridge, aligning it correctly with the faucet body.
- Reassemble the faucet: Reinstall the retaining clip and handle.
Fixing a Ceramic Disc Faucet Leak
- Turn off the water supply.
- Remove the handle: This usually involves loosening a set screw.
- Remove the escutcheon cap: Unscrew or pry off the escutcheon cap.
- Remove the ceramic disc cartridge: Loosen the screws holding the cartridge in place and lift it out.
- Inspect the ceramic discs: Look for cracks or chips. If the discs are damaged, replace the entire cartridge.
- Clean the cartridge and valve body: Use white vinegar to remove any mineral deposits.
- Reassemble the faucet: Reassemble the faucet in the reverse order.
Advanced Troubleshooting: When to Call a Plumber
While many leaky faucet repairs are straightforward, some situations require the expertise of a professional plumber. Consider calling a plumber if:
- You’re uncomfortable working with plumbing.
- You can’t identify the source of the leak.
- The faucet is severely corroded or damaged.
- You’ve tried to fix the leak yourself, but it’s still dripping.
- You encounter unexpected problems during the repair process.
Attempting to fix a complex plumbing problem without the proper knowledge and tools can lead to further damage and costly repairs. It’s always better to err on the side of caution and call a professional when in doubt. Leading plumbing experts generally agree that attempting DIY repairs without sufficient knowledge can exacerbate the problem.
Maintaining Your Kitchen Faucet to Prevent Future Leaks
Preventing leaks is always better than fixing them. Here are some tips for maintaining your kitchen faucet:
- Clean your faucet regularly: Wipe down the faucet with a soft cloth and mild soap to remove mineral deposits and grime.
- Lubricate moving parts: Apply plumber’s grease to O-rings and other moving parts to prevent corrosion and wear.
- Replace worn-out parts promptly: Don’t wait until a leak becomes a major problem. Replace washers, O-rings, and cartridges as soon as you notice signs of wear.
- Avoid using abrasive cleaners: Abrasive cleaners can damage the finish of your faucet and cause leaks.
- Check for leaks regularly: Inspect your faucet periodically for any signs of leaks and address them promptly.
Choosing the Right Replacement Parts: Ensuring Compatibility and Quality
When replacing parts, it’s crucial to choose the correct ones for your specific faucet model. Using incompatible parts can lead to leaks or damage the faucet. Here’s how to ensure you get the right replacements:
- Identify your faucet model: Look for a model number on the faucet body or in the manufacturer’s documentation.
- Take the old parts with you: When you go to the hardware store, bring the old parts with you to compare them to the new ones.
- Consult with a plumbing expert: If you’re unsure about which parts to buy, ask a plumbing expert for advice.
- Choose high-quality parts: Opt for parts made from durable materials that are designed to last.
Investing in high-quality replacement parts will not only ensure a successful repair but also extend the lifespan of your faucet. Our extensive testing indicates that using generic, low-quality parts often leads to premature failure and the recurrence of leaks.
The Environmental and Financial Impact of Leaky Faucets
A seemingly small drip can waste a significant amount of water over time, leading to higher water bills and contributing to water scarcity. According to the EPA, a leaky faucet can waste hundreds or even thousands of gallons of water per year. Fixing a leaky faucet is not only a smart financial decision but also an environmentally responsible one.
By taking the time to repair your leaky faucet, you’re doing your part to conserve water and protect our planet’s precious resources. Furthermore, you’ll be saving money on your water bill each month. It’s a win-win situation for you and the environment.
Upgrading Your Kitchen Faucet: A Modern Solution for Enhanced Functionality
If your faucet is old, corroded, or constantly leaking, it might be time to consider upgrading to a new one. Modern kitchen faucets offer a variety of features and styles that can enhance the functionality and aesthetics of your kitchen. Consider options such as pull-down sprayers, touchless operation, and water filtration systems. These features can make your kitchen more convenient and efficient.
Is DIY Right for You? Weighing the Options for Faucet Repair
Deciding whether to tackle a leaky faucet repair yourself or hire a professional plumber depends on your skill level, comfort level, and the complexity of the problem. If you’re a confident DIYer with some plumbing experience, you can likely handle a simple repair. However, if you’re uncomfortable working with plumbing or the problem seems complex, it’s best to call a plumber. Remember, safety should always be your top priority.
Still Drip-Free?
Fixing a leaky faucet in the kitchen is a manageable DIY project that can save you money and conserve water. By understanding the different types of faucets, gathering the necessary tools, and following the step-by-step instructions outlined in this guide, you can confidently tackle this common household problem. Remember to always turn off the water supply before starting any repairs and to choose high-quality replacement parts. If you encounter any difficulties or are unsure about any aspect of the repair process, don’t hesitate to call a professional plumber. Share your experiences with fixing leaky faucets in the comments below!
